In this 20-minute webinar, METER scientist Leo Rivera compares available methods and teaches how to combine the latest technology to generate full, accurate curves with hundreds of points in only a couple of days—instead of a couple of months.
Combine technology for more accurate soil moisture release curves
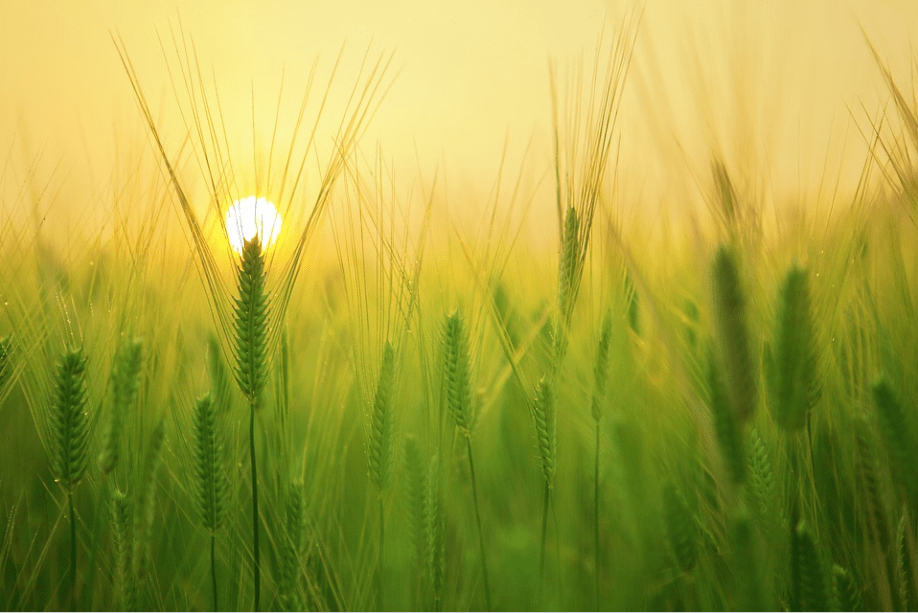
If you’re still spending months generating a handful of points to produce only a partial soil characteristic curve—old-school methods are holding you back. What if you could create a soil moisture release curve in just 48 hours? And not just a curve with a few points, but a detailed absorption and desorption curve composed of hundreds of points that show exactly what happens as your soil absorbs and desorbs water throughout the entire range of water potentials?
Change the way you understand your soil
Partial curves made with older methods don’t give you enough data for a complete picture of what’s happening in your soil. Hundreds of studies show that faster, high-precision modern methods are more accurate—so you can reach better conclusions that stand up to rigorous scientific scrutiny. In this 20-minute webinar, METER scientist Leo Rivera compares available methods and teaches how to combine the latest technology to generate full, accurate curves with hundreds of points in only a couple of days—instead of a couple of months. Learn:
The science behind current available methods
The pros and cons of each method
Advances in soil moisture release curve technology
Leo Rivera operates as a research scientist and Hydrology Product Manager at METER Group, the world leader in soil moisture measurement. He earned his undergraduate degree in Agriculture Systems Management at Texas A&M University, where he also got his Master’s degree in Soil Science. There he helped develop an infiltration system for measuring hydraulic conductivity used by the NRCS in Texas. Currently, Leo is the force behind application development in METER’s hydrology instrumentation including HYPROP and WP4C. He also works in R&D to explore new instrumentation for water and nutrient movement in soil.
In this latest chalk talk video, METER soil scientist and application expert, Leo Rivera, discusses the use of pedotransfer functions (PTFs) for predicting soil properties such as hydraulic conductivity and field capacity.
He explains that while direct measurements are ideal, PTFs can provide rapid, cost-effective alternatives. PTFs use soil texture, particle size distribution, and bulk density as inputs, with accuracy depending on the quality of the database and the input data. There are limitations, such as PTFs not accounting for soil structure and organic matter, which can significantly impact hydraulic conductivity, thus, Rivera recommends using PTFs judiciously. PTFs can be especially helpful for large-scale assessments, and he suggests seeking tools that incorporate more parameters for improved accuracy.
0:00 Hi. My name is Leo Rivera, and this is a METER Chalk Talk.
0:11 Today I want to talk about a topic that I get asked a lot about, and it has to do with how to predict some of these soil properties that we typically measure. So we often have used tools to measure things like soil hydraulic conductivity, retention curves, predicting field capacity and permanent wilting point. And ideally, that’s the best way we can do it, is by making those measurements. But that’s not always an option. So there are times where we need to be able to more rapidly assess soil properties, where we don’t have the budget to assess some of these more expensive soil properties to measure. And there are tools available to make these predictions rather than making the measurements. And I want to talk about those today to make sure that you understand the capabilities of these tools, that they’re out there, but also understand the limitations. And so the primary tool I’m going to talk about is a pedotransfer function, or a PTF.
So typically, with a pedotransfer function, we’re using something like soil texture. So for example, I have here an image of the soil triangle, and I can say I have a clay loam soil. So I’ve got my clay loam right here. And my goal is to predict field capacity. My goal is to predict field capacity for minus 33 kPa, and permanent wilting point, which is minus 1500 kPa, typically to make those measurements, it’s going to take several days to several months, depending on how you choose to make that measurement. But that’s not always an option. So we can use a petal transfer function to take that property, like soil texture, and predict those values. And pedotransfer functions also can be used to predict things like hydraulic conductivity. So you can see an example of a hydraulic conductivity graph here as well. So a pedotransfer function can be a really powerful tool to predict some of these properties that are typically take more time or more expensive to measure, and maybe you don’t have the time to make those measurements. So it’s really important to understand how a pedotransfer function works before utilizing this tool.
So pedotransfer functions utilize databases, whether it’s soil survey or other generated databases, where you have a lot of soil data, and you have all of these data, like texture, density, where they’ve already measured, hydraulic conductivity and some of these other soil properties. It then takes your input and utilizes that database to best predict what those values are that you’re trying to assess. So if I’m trying to predict, for example, field capacity, you can input parameters like soil texture, particle size distribution and bulk density. And you can do this in various orders. You can use soil texture on its own. You can use particle size distribution on its own, or you can combine particle size distribution and soil bulk density together to make these predictions. And it’s going to go into that database and try and make its best prediction based on the data available on that database.
Your pedotransfer function is only going to be as strong as the data that’s in the database, but it’s also only going to be as powerful as how good of an input you give it to predict these these values. So if we’re using soil texture on its own, as you can imagine, if I was predicting a clay as a soil texture, we’ll just use that as our example. If we look at our clay soil on the on the soil texture triangle, that is a huge range of combinations of sand, silt and clay fraction. So as you can imagine, that’s a pretty broad area that you’re trying to predict from, and there’s a higher potential for error in that prediction. Now, if we were to refine that and use the particle size distribution, so if we knew our exact sand, silt and clay fraction that we were trying to predict, we could then refine our predictions. We’re going to get rid of that circle, and we’re going to refine our prediction, saying, our soil has exactly this amount of sand, silt and clay. And that’s going to refine how the pedotransfer function is pulling those data from in the database to predict those values.
But as we know, soil texture on its own and particle size on its own only tells part of the story. So we can further refine that by adding our bulk density into that prediction, which is going to help improve the prediction of either field capacity or hydraulic conductivity. And in some areas, that should be fine. And so as long as you’re happy with that level of error, that’s fine. But, especially when we’re looking at things like hydraulic conductivity, we know there are other factors that play a big role in hydraulic conductivity, such as soil structure. So ideally, we would be including structure in our prediction, and organic matter in our prediction, because we all we know that these play a significant role in how soil transmits water, but most pedotransfer function, tools like Rosetta and Soil View don’t really take these into account.
So when you’re looking at these values, especially trying to assess measurements like hydraulic conductivity, you need to understand these limitations when using these tools. Now, there are other databases and pedotransfer function tools out there that are doing a better job of taking some of these into account. And if you’re going to use those tools, you want to try to make sure, if you’re if you’re really concerned with the accuracy of your values that you’re using pedotransfer function models that take more of these parameters into account. So the more inputs you can have into your prediction, the more accurate you’re likely going to come out with your predictions of these factors.
I just wanted to cover some of the basics on pedotransfer functions, and if you’re going to use them. They’re really powerful tools if we need to use them, especially when we’re trying to characterize large areas. It’s not always feasible to make measurements across these large areas, and they can help give us a little more data to work off of, rather than just the measurements on their own to try and characterize what’s happening across the large watershed, for example. But we need to understand how our inputs can affect the accuracy of those predictions. If you want to learn more about this or other topics, please visit us on our website www.metergroup.com or on our YouTube channel under meter talk talks and thank you for watching.
You’ve buried soil water content and water potential sensors in the ground, installed an ATMOS 41 in the field, and set up your ZL6 data logger. Your network of instruments has been collecting data for days, weeks, or even all season. Now what? Performing soil moisture data analysis for your research location is one thing. Knowing how to extrapolate meaningful inferences and conclusions to understand what is happening and troubleshoot issues is completely different.
In this article, we will step through multiple data sets to understand how soil water content, soil temperature, soil water potential, and atmospheric measurements can be used to discover the meaning behind the traces. Within this article you will learn how to identify the following events in your data:
Behavior of soil moisture sensors in different soil types
Infiltration
Flooding
Soil cracking
Freezing
Spatial variability
Temperature effects
Diurnal patterns due to hydraulic redistribution
Broken sensors
Installation problems
Each example will be represented by a graph. It is not necessary to understand every aspect of information within these graphs. Each one is used as an illustration of common soil moisture data patterns you might run into and how to extrapolate the most useful information possible from the patterns seen. Each graph will have a box in the upper right-hand side corner with the soil type and crop type so you have a better understanding of the variables at play.
All of the data provided was collected by data loggers, such as our ZL6 series, and uploaded to ZENTRA Cloud for remote viewing at the convenience of the user. All data sets are either from METER’s own instrumentation or are supplied by the data owner and are included with their permission.
Figure 1. ZL6 Basic data logger with data collected and stored within the ZENTRA Cloud platform
Effects of soil types
Figure 2. Water content and water potential measurements for a turf grass in loamy sand in wet conditions
In Figure 2 we see the data from an engineered loamy sand with a cover crop of turf grass. Our goal when executing our experiments in this example was to improve irrigation in turf grass. This grass had a fairly shallow root zone, the middle of which was about six cm deep and the bottom at about 10 cm. Over time, this example showed first relatively wet conditions to start through June and July, a fixed drying period condition in July and August, and drying until the cessation of water uptake in August and September.
This graph shows two soil moisture data types: volumetric water content on the left y-axis and matric potential, or water potential, on the right y-axis. Time is on the x-axis ranging from early summer to the start of fall. To understand what these data clusters can tell us, we must look at each data set individually.
There’s a lot to consider when collecting soil moisture measurements.
Get your soil moisture questions answered in our Office Hours series.
Join Environment Support Manager, Chris Chambers, and Director of Science Outreach, Leo Rivera, as they discuss submitted questions all about getting the best soil moisture measurements.
In the full episode, they discuss:
How difficult is the calibration of dielectric sensors?
How does soilless media affect the operation of dielectric sensors?
How much can organic soil amendments influence soil moisture?
Is it possible to determine the soil hydraulic properties from soil water content?
Why volumetric water content instead of gravimetric water content?
What is the best way to correct for the temperature sensitivity of sensors?
In this chalk talk video, world-renowned soil physicist, Dr. Gaylon Campbell, discusses how many measurements researchers and growers need to characterize soil moisture at a field or research site. He explores the question: What is the relationship between the measurements that you make and the underlying value of water content in the field?
Presenter
Dr. Gaylon S. Campbell has been a research scientist and engineer at METER for 19 years following nearly 30 years on faculty at Washington State University. Dr. Campbell’s first experience with environmental measurement came in the lab of Sterling Taylor at Utah State University making water potential measurements to understand plant water status. Dr. Campbell is one of the world’s foremost authorities on physical measurements in the soil-plant-atmosphere continuum. His book written with Dr. John Norman on Environmental Biophysics provides a critical foundation for anyone interested in understanding the physics of the natural world. Dr. Campbell has written three books, over 100 refereed journal articles and book chapters, and has several patents.
We quite often get a question from customers about how many measurements we need to characterize soil moisture at a site. And so that’s what I want to talk about today. A number of years ago, I knew a man who was wanting to provide a business of making soil moisture measurements for the purpose of irrigation scheduling for farmers. And he came to me wondering how many samples he should take. He figured that he wanted a fairly simple way of determining soil moisture.
So, he thought he would go into the field and he would collect soil samples from the field, he would take them back to the laboratory, he would dry them and weigh them and dry them and determine water content. And he wondered how many samples would be required to determine the water content to provide this information for a farmer.
Now, that’s not so different from the kinds of information that are often required either for practical applications like irrigation scheduling, or for research purposes. We can see the broader applications of the question of, “what’s the relationship between the measurements that we take and the underlying value of water content in the field?”
Soil water content will vary from place to place.
I think you can see that the same thing would apply whether we were taking samples and bringing them back to the laboratory, or if we were putting in soil moisture sensors, and wanting to monitor soil moisture in the field. So, the first thing we need to talk about soil moisture is a random variable, we need some vocabulary for talking about that. Two terms are important: mean and standard deviation.
If we were to collect many samples of water content from a field, and we were to plot the number of samples versus the water content of the samples, we would obtain a relationship something like this. We would get the most samples around some central value, and that central value is the mean.
The standard deviation is a measure of the dispersion around the mean. 68% of the values that we take would be within plus or minus one standard deviation of that mean value. 95% would be within plus or minus two standard deviations of the mean value.
So, let’s say that we walked out here in the field, and we took a sample and made a measurement on it. And let’s say out of that sample, we determined the water content was 27%. Now let’s say that we assume or we know from some means that the standard deviation is 3%. Then, by these ideas, we would know that the mean value – the expected value for the water content – is or at least there would be a 95% probability that the mean value of the water content would be somewhere between 21% and 33%. The mean value plus two times the standard deviation and the mean value minus two times the standard deviation.
Now we may say, “well that’s not good enough. We need better values than that. So what do we do? We need to take more samples. And so we take a number of samples and average them. And so we can know what the result of averaging several samples is, with a simple relationship. The uncertainty in the average value that we get–the standard deviation of the mean–is the standard deviation, divided by the square root of the number of samples.
So let’s say that we went out in the field, and we took 100 samples. Then the standard deviation of the mean, would be our standard deviation that we assumed before, divided by the square root of 100. The square root of 100, of course, is 10. And so that would be 0.3%. If we determined a value of 28% for that mean of the 100 samples, then with 95% confidence, we can say that the water content is between 27.4 (2 standard deviations below the mean), and 28.6.
Now we’re getting closer then to our quest of determining the number of samples that we need to take. We start out with that equation that we just had that the standard deviation of the mean is equal to the standard deviation divided by the square root of the number of samples. We can rearrange that to say that the number of samples that we need is equal to the standard deviation divided by the standard deviation of the mean, and that value squared. So, the error that we normally would talk about in the measurement–if we’re again talking about 95% confidence–the error is half of the standard deviation of the mean.
This number of samples is two times the standard deviation over the air, and that all squared. So, if we work through a little problem with that, how many samples would we need in order to know the water content within 1%? If the standard deviation is 3%, the way we’ve assumed.
So, the standard deviation is 3%. The error value that we want to get to is 1%. We want to take enough samples so that we have 95% confidence that we’re within 1%. And so the number of samples is 2 times 3%, divided by the air, 1%, and that’s all squared. And that comes out to be 36 samples. Well, when we see that number, typically we get pretty discouraged. That’s more samples than we want to take. More samples probably than we can afford to take.
To see how that relates to reality, we did a little experiment. Here we have a soccer field out behind the METER (formerly Decagon) building. We went out and took one of our sensors, the GS3, and hooked it up to our little handheld device. And we set up three transects 20 meters long, parallel with each other and spaced a meter apart. We went along and took samples every meter along these transects. And I have a little video here that shows how that sampling went. The result of that sampling is shown in this next slide.
This slide shows the result of that set of measurements that we made. And you can see it looks about like you would expect it to. We’ve got some variation, we show a mean value and some variation around it. The transects, again, showed variability but seemed to be showing about the same result for each transect. We had 60 samples there.
The average water content that we computed was 38.6%. The standard deviation was not 3%, but 5%. So, the situation is even worse than we imagined with these calculations that we just did here. With a standard deviation of 5%, if we want to know the water content within 1%, we would need 100 samples to do that. And so even with our 60 samples, here, our standard deviation of the mean is 0.65%. And so our field water content is somewhere between 37.3 and 39.9.
Well, as I say that usually is discouraging when we get to that point and see how many samples are needed to make a set of measurements, but the thing is that quite often, the thing that we need to know is not an accurate value for the average water content. Quite often, what we want to know is how much the water content is changing. And that we can know in other ways, accurately enough, so that we don’t need that many samples.
That person that I started out talking about who was wanting to schedule irrigation would need to know water content with an accuracy of 1%. Well, at least with a precision of 1% or better. But that could be achieved much more readily by installing a sensor in situ, where you’re not dealing with the spatial variability in the soil and monitoring that.
Here I’ve shown some data that we took in the field with one of our 5TE sensors hooked up to a data logger. The water content is sampled every minute, it’s averaged over hour intervals, and the plot that you see here is a plot of the water content measured each hour. Then, you can see a period of time where the soil is drying, because the plants are using water. You can see an increase in water content that results from adding water through irrigation or rain. And then again, the water content decreasing as the water is used. And you see very little variation in those data.
Now if this guy that wanted to provide the irrigation scheduling service, had wanted to do this same thing by sampling, the next slide shows the result that he would have gotten if he had gone out every hour and taken one soil sample and plotted the result.
This is what he would have gotten; the blue lines that you see. And you can see that it’s about what you would expect: that the highest values are about 10% higher than the mean value, the lowest values are about 10% lower, and the standard deviation we said is about 5. So, that’s about what we would expect. But from these kinds of data, there’s no possibility that you could ever tell when you should irrigate.
In the next slide, I show the result that you would have gotten if you went out and took 10 samples every hour. And here you can see the pattern to some extent of when the drying and wetting occur, but there’s still an awful lot of variation.
The next slide shows the result of taking 100 samples every hour, a ridiculous thought, but again, there’s still some variation in it. It still doesn’t look anywhere near as good as the in situ sample. When we’re just looking for the changes in water content, the water storage, and water use, in situ measurements make a lot more sense than soil moisture sampling.
So, let me conclude just by a few points that I hope to have made in this. First of all, the soil water content varies from place to place; that’s inherent in nature. It’s something that we expect anytime we go out to measure soil moisture. We usually need to take an average of moisture at several locations in order to know what the water content of a field is, or an experimental site. We usually can’t afford to take enough measurements to really know what it is to have it within the accuracy that we would like to have it. And so we can go through this exercise that I’ve gone through here, we can determine the number that we need, but usually, our budget won’t allow us to put in that many and so we end up compromising to some extent.
Advances in sensor technology and software now make it easy to understand what’s happening in your soil, but don’t get stuck thinking that only measuring soil water content will tell you what you need to know.
Water content is only one side of a critical two-sided coin. To understand when to water, plant-water stress, or how to characterize drought, you also need to measure water potential.
Better data. Better answers.
Soil water potential is a crucial measurement for optimizing yield and stewarding the environment because it’s a direct indicator of the availability of water for biological processes. If you’re not measuring it, you’re likely getting the wrong answer to your soil moisture questions. Water potential can also help you predict if soil water will move, and where it’s going to go. Join METER soil physicist, Dr. Doug Cobos, as he teaches the basics of this critical measurement. Learn:
What is water potential?
Why water potential isn’t as confusing as it’s made out to be
Common misconceptions about soil water content and water potential
Dr. Cobos is a Research Scientist and the Director of Research and Development at METER. He also holds an adjunct appointment in the Department of Crop and Soil Sciences at Washington State University where he co-teaches Environmental Biophysics. Doug’s Masters Degree from Texas A&M and Ph.D. from the University of Minnesota focused on field-scale fluxes of CO2 and mercury, respectively. Doug was hired at METER to be the Lead Engineer in charge of designing the Thermal and Electrical Conductivity Probe (TECP) that flew to Mars aboard NASA’s 2008 Phoenix Scout Lander. His current research is centered on instrumentation development for soil and plant sciences.
What was the life of a scientist like before modern measurement techniques? In our latest podcast, Campbell Scientific’s Ed Swiatek and METER’s Dr. Gaylon Campbell discuss their association with three pioneers of environmental measurement.
Learn what it was like to practice science on the cutting edge. Discover the creative lengths they went to and what crazy things they cobbled together to get the measurements they needed.
Two researchers show easier methods conform to standards
If you’re measuring saturated hydraulic conductivity with a double ring infiltrometer, you’re lucky if you can get two tests done in a day. For most inspectors, researchers, and geotechs—that’s just not feasible. Historically, double ring methods were the standard, however the industry is now more accepting of faster single ring methods with the caveat that enough locations are tested. But how many locations are enough?
Triple the tests you run in a day
Drs. Andrea Welker and Kristin Sample-Lord, researchers at Villanova University, are changing the way infiltration measurements are captured while keeping the standards of measurement high. They ran many infiltration tests with three types of infiltrometers with a variety of sizes and soil types. In this 30-minute webinar, they’ll discuss what they found to be the acceptable statistical mean for a single rain garden. Plus, they’ll reveal the pros and cons of each infiltrometer type and which ones were the most practical to use. Learn:
What types of sites were tested
How the spot measurements compared with infiltration rates over the whole rain garden
Pros and cons of each infiltrometer and how they compared for practicality and ease of use
What is an acceptable number of measurements for an accurate assessment
Dr. Andrea Welker, PE, F.ASCE, ENV SP, is a Professor of Civil and Environmental Engineering and the Associate Dean for Academic Affairs at Villanova University. She joined Villanova after obtaining her PhD at the University of Texas at Austin. Her research focuses on the geotechnical aspects of stormwater control measures (SCMs) and the effectiveness of SCMs at the site and watershed scale.
Dr. Kristin Sample-Lord, P.E., is an Assistant Professor of geotechnical and geoenvironmental engineering in the Civil and Environmental Engineering Department at Villanova University. She received her PhD and MS from Colorado State University. Her research includes measurement of flow and transport in soils, with specific focus on green infrastructure and hydraulic containment barriers.
Soil moisture data analysis is often straightforward, but it can leave you scratching your head with more questions than answers. There’s no substitute for a little experience when looking at surprising soil moisture behavior.
Join Dr. Colin Campbell April 21st, 9am PDT as he looks at problematic and surprising soil moisture data.
Understand what’s happening at your site
METER soil scientist, Dr. Colin Campbell has spent nearly 20 years looking at problematic and surprising soil moisture data. In this 30-minute webinar, he discusses what to expect in different soil, environmental, and site situations and how to interpret that data effectively. Learn about:
Telltale sensor behavior in different soil types (coarse vs. fine, clay vs. sand)
Possible causes of smaller than expected changes in water content
Factors that may cause unexpected jumps and drops in the data
What happens to dielectric sensors when soil freezes and other odd phenomena
Surprising situations and how to interpret them
Undiagnosed problems that affect plant-available water or water movement
Why sensors in the same field or same profile don’t agree
My name is Colin Campbell, I’m a research scientist here at METER group. Today we’re going to spend time doing a data deep dive. We’ll be looking at some data coming from my research site on the Wasatch Plateau at 10,000 feet (3000 meters) in the middle of the state of Utah.
Right now, I’m interested in looking at the weather up on the plateau. And as you see from these graphs, I’m looking at the wind speeds out in the middle of three different meadows that are a part of our experiment. At 10,000 feet right now, things are not that great. This is a picture I collected today. If you look very closely, there’s an ATMOS 41 all-in-one weather station. It includes a rain gauge. And down here is our ZENTRA ZL6 logger. It’s obviously been snowing and blowing pretty hard because we’ve got rime ice on this post going out several centimeters, probably 30 to 40 cm. This is a stick that tells us how deep the snow is up on top.
One of the things we run into when we analyze data is the credibility of the data and one day someone was really excited as they talked to me and said, “At my research site, the wind speed is over 30 meters per second.” Now, 30 meters per second is an extremely strong wind speed. If it were really blowing that hard there would be issues. For those of you who like English units, that’s over 60 miles an hour. So when you look at this data, you might get confused and think: Wow, the wind speed is really high up there. And from this picture, you also see the wind speed is very high.
But the instrument that’s making those measurements is the ATMOS 41. It’s a three-season weather station, so you can’t use it in snow. It’s essentially producing an error here at 30 meters per second. So I’ll have to chop out data like this anemometer data at the summit where the weather station is often encrusted with snow and ice. This is because when snow builds up on the sonic anemometer reflection device, sometimes it simply estimates the wrong wind speed. And that’s what you’re seeing here.
This is why it’s nice to have ZENTRA cloud. It consistently helps me see if there’s a problem with one of my sensors. In this case, it’s an issue with my wind speed sensors. One of the other things I love about ZENTRA Cloud is an update about what’s going on at my site. Clearly, battery use is important because if the batteries run low, I may need to make a site visit to replace them. However, one of the coolest things about the ZL6 data logger is that if the batteries run out, it’s not a problem because even though it stops sending data over the cellular network, it will keep saving data with the batteries it has left. It can keep going for several months.
I have a mix of data loggers up here, some old EM60G data loggers which have a different voltage range than these four ZL6 data loggers. Three of these ZL6s are located in tree islands. In all of the tree islands, we’ve collected enough snow so the systems are buried and we’re not getting much solar charging. The one at the summit collects the most snow, and since late December, there’s been a slow decline in battery use. It’s down. This is the actual voltage on the batteries. The battery percentage is around 75%. The data loggers in the two other islands are also losing battery but not as much. The snow is just about to the solar charger. There’s some charging during the day and then a decrease at night.
So I have the data right at my fingertips to figure out if I need to make a site visit. Are these data important enough to make sure the data loggers call in every day? If so, then I can decide whether to send someone in to change batteries or dig the weather stations out of the snow.
I also have the option to set up target ranges on this graph to alert me whether the battery voltage is below an acceptable level. If I turn these on, it will send me an email if there’s a problem. So these are a couple of things I love about ZENTRA cloud that help me experiment better. I thought I’d share them with you today. If you have questions you want to get in contact me with me, my email is [email protected]. Happy ZENTRA clouding.